How to Take Better iPhone Photographs
We’re often asked by folks who follow along on Instagram, “How do I shoot better images with my iPhone?” Most of the photographs we snap on a daily basis are shot with our iPhones. Why the iPhone and not our professional Canon gear? Simply put, the best camera is the one you have with you...and we always have our iPhones with us.
Keep Compositions Simple
When shooting with your iPhone, look for easily readable patterns or symmetry. Keep in mind that photos sent to other phones will be viewed small. This image of a door in New York’s West Village struck Fred for its clean lines and symmetry.

Be Intentional About Cropping
Every image we shoot is cropped after the fact. The native crop ratio isn’t always what best suits the composition. For example, a square format is popular on Instagram whereas landscapes are better suited to cinematic ratios.


Choose a Window Seat
When flying, choose a window seat. The view is nice from 36,000 feet above sea level. The image taken over the North Atlantic was created while en route to The Bahamas. Using iPhone’s grid, the island is intentionally composed at the lower right/third of the frame while leading lines guide the eye diagonally from right to left.
And the image of the Rocky Mountains? You're only getting that from a window seat. Including the wing of the jet contextualizes the scene and provides a sense of place and scale.
Turn the Grid On
The “Rule of Thirds” is one of the first principles students of photography learn in the classroom. While this principle can be broken in good taste, you will consistently create better images by employing it. Turning the optional grid on in the iPhone’s camera will help ensure it is always top of mind. We keep ours on all the time.

Embrace Motion
Motion often conveys emotion—it’s a heightened candid moment. Capturing motion with an iPhone often results in part of your image being blurry—and that’s okay! Fred shot this image at a Girl Talk show during last summer’s Firefly Music Festival. What makes this work is the motion of the hands and confetti set against a backdrop that is sharp and in focus. Every time we look at it we’re right back in the middle of that swarming, sweaty rave.


Good Light is Key
For the last ten years, Fred has created photographs with available sunlight almost exclusively. It’s simple, yet it can take months to recognize poor light from good light, and years to recognize good light from great light. The iPhone’s simple but capable lens is best suited for shooting with natural light. This point-of-view canoe shot was created an hour or two after sunrise, what is commonly referred to as “golden hour.”

Don’t Just Stand There
Most, if not all these images Fred shot here were not created by him just standing up straight and holding his iPhone out. At 5’11” he often gets low in framing his composition or he’s shooting down from up above, or he’s humanizing the image by including a part of himself in the frame…known as a first person point-of-view shot. The point being, don’t just stand there.

Use Your Flash Sparingly
While natural light often creates better images on the iPhone, the flash can be used to achieve a certain effect (also read “The Terry Richardson” effect) when you want a harsh drop shadow. This image of Fred's Swiss army knife in a cork was shot against a white wall in order to create the drop shadow.

Zoom with Your Feet
The digital zoom might be the most useless feature of the iPhone’s camera—stay away from it. It’s quite deceiving actually. Instead of the lens zooming in, the iPhone is actually cropping in close on your image before you ever release the shutter. When you want to get closer, use your feet. It produces a crisper, higher resolution image. In this case at the Head of the Charles, that meant leaning as far over the bridge wall as possible and waiting for the boat to glide into frame.

Use Two Hands for Stability
Whether we’re shooting in portrait or landscape mode...we're always shooting with HDR on (or high dynamic range). It's a feature that allows the capture of greater detail in highlights and shadows. The iPhone automatically blends the best parts of three photos taken quickly at different exposures—one at normal exposure, then one each of the brightest and darkest parts of the composition. The result is a single photo with better color and detail. This feature requires some stability. We like to hold the iPhone in both hands and release the shutter with our right thumb. This minimizes camera shake for the three photos taken in quick succession. To further minimize camera shake, breath out gently and press the shutter at the end of your exhale.
Be Aware of Moments
Some of the most powerful candid photographs depict people in some portion of the full spectrum of human emotion. Easier said than done of course. Capturing the “decisive moment” is an art form that is often honed over a lifetime—Henri Cartier-Bresson was arguably the best at it. But it starts with being aware of what’s around you...and then rattling off a bunch of shots. After the moment has passed, go back and pick the decisive one. Apple recently made it easier to capture these moments by granting quicker access to the iPhone camera from the lock screen with one swipe and implementing burst mode by simply holding down the shutter button.
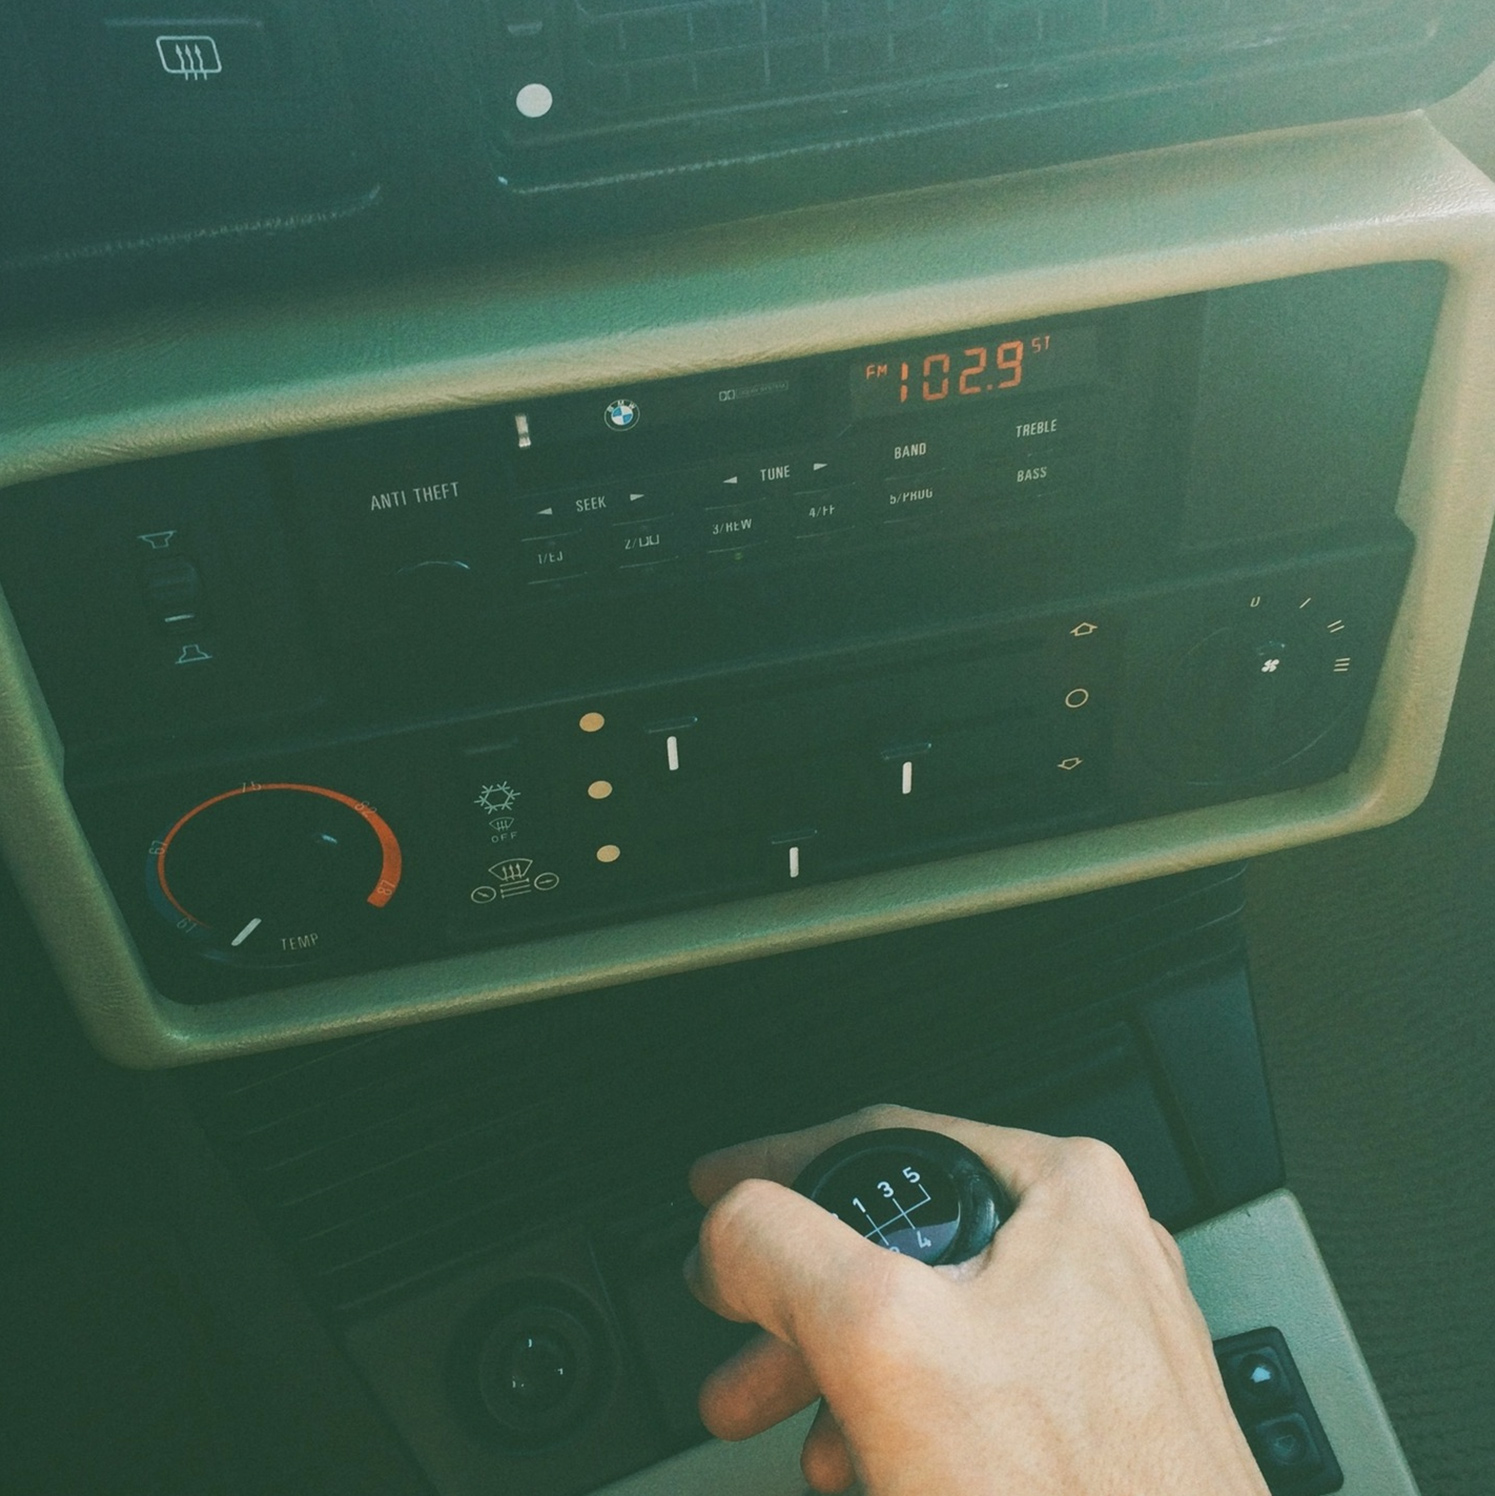
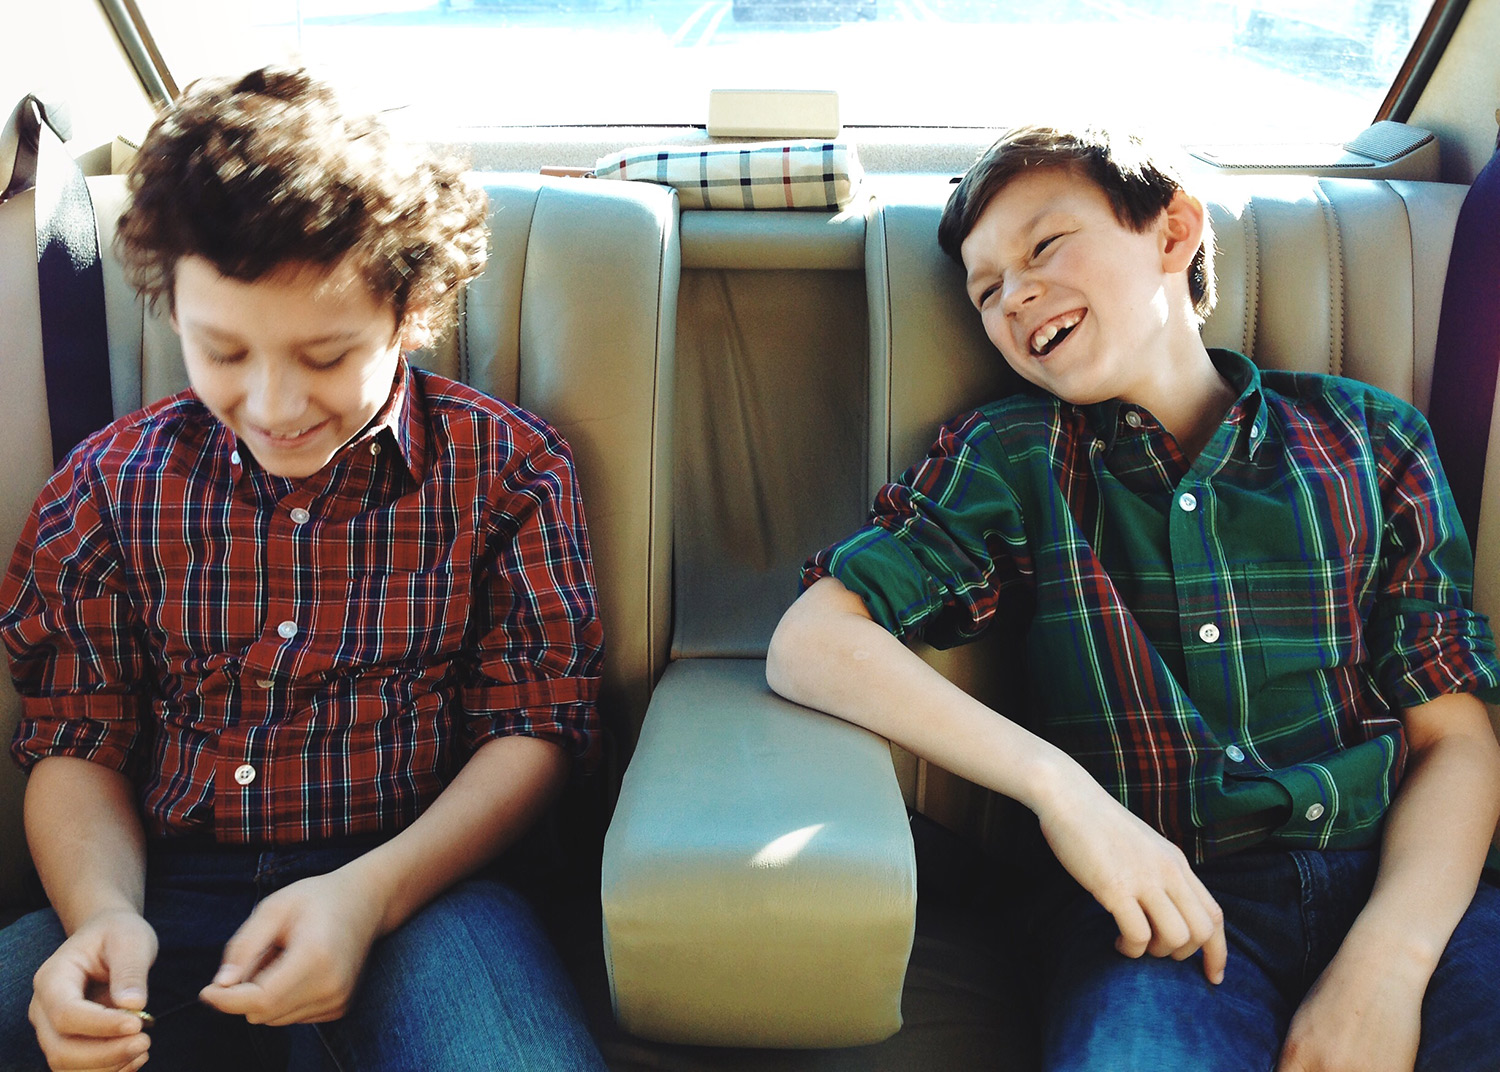
Use the AE/AF Lock
As you may already know, you can tap once on the iPhone’s screen to focus and set the exposure of your image...but then you move slightly and the exposure changes on you. By tapping and holding on the area you want to expose for, the AE/AF lock is activated. This feature allows you to shoot back-lit photographs like this one of Fred’s boys in the backseat of his Bimmer (above). The bright sun was coming in through the back window and by locking the exposure on their darker clothing, he was able to properly expose for their clothes and faces.
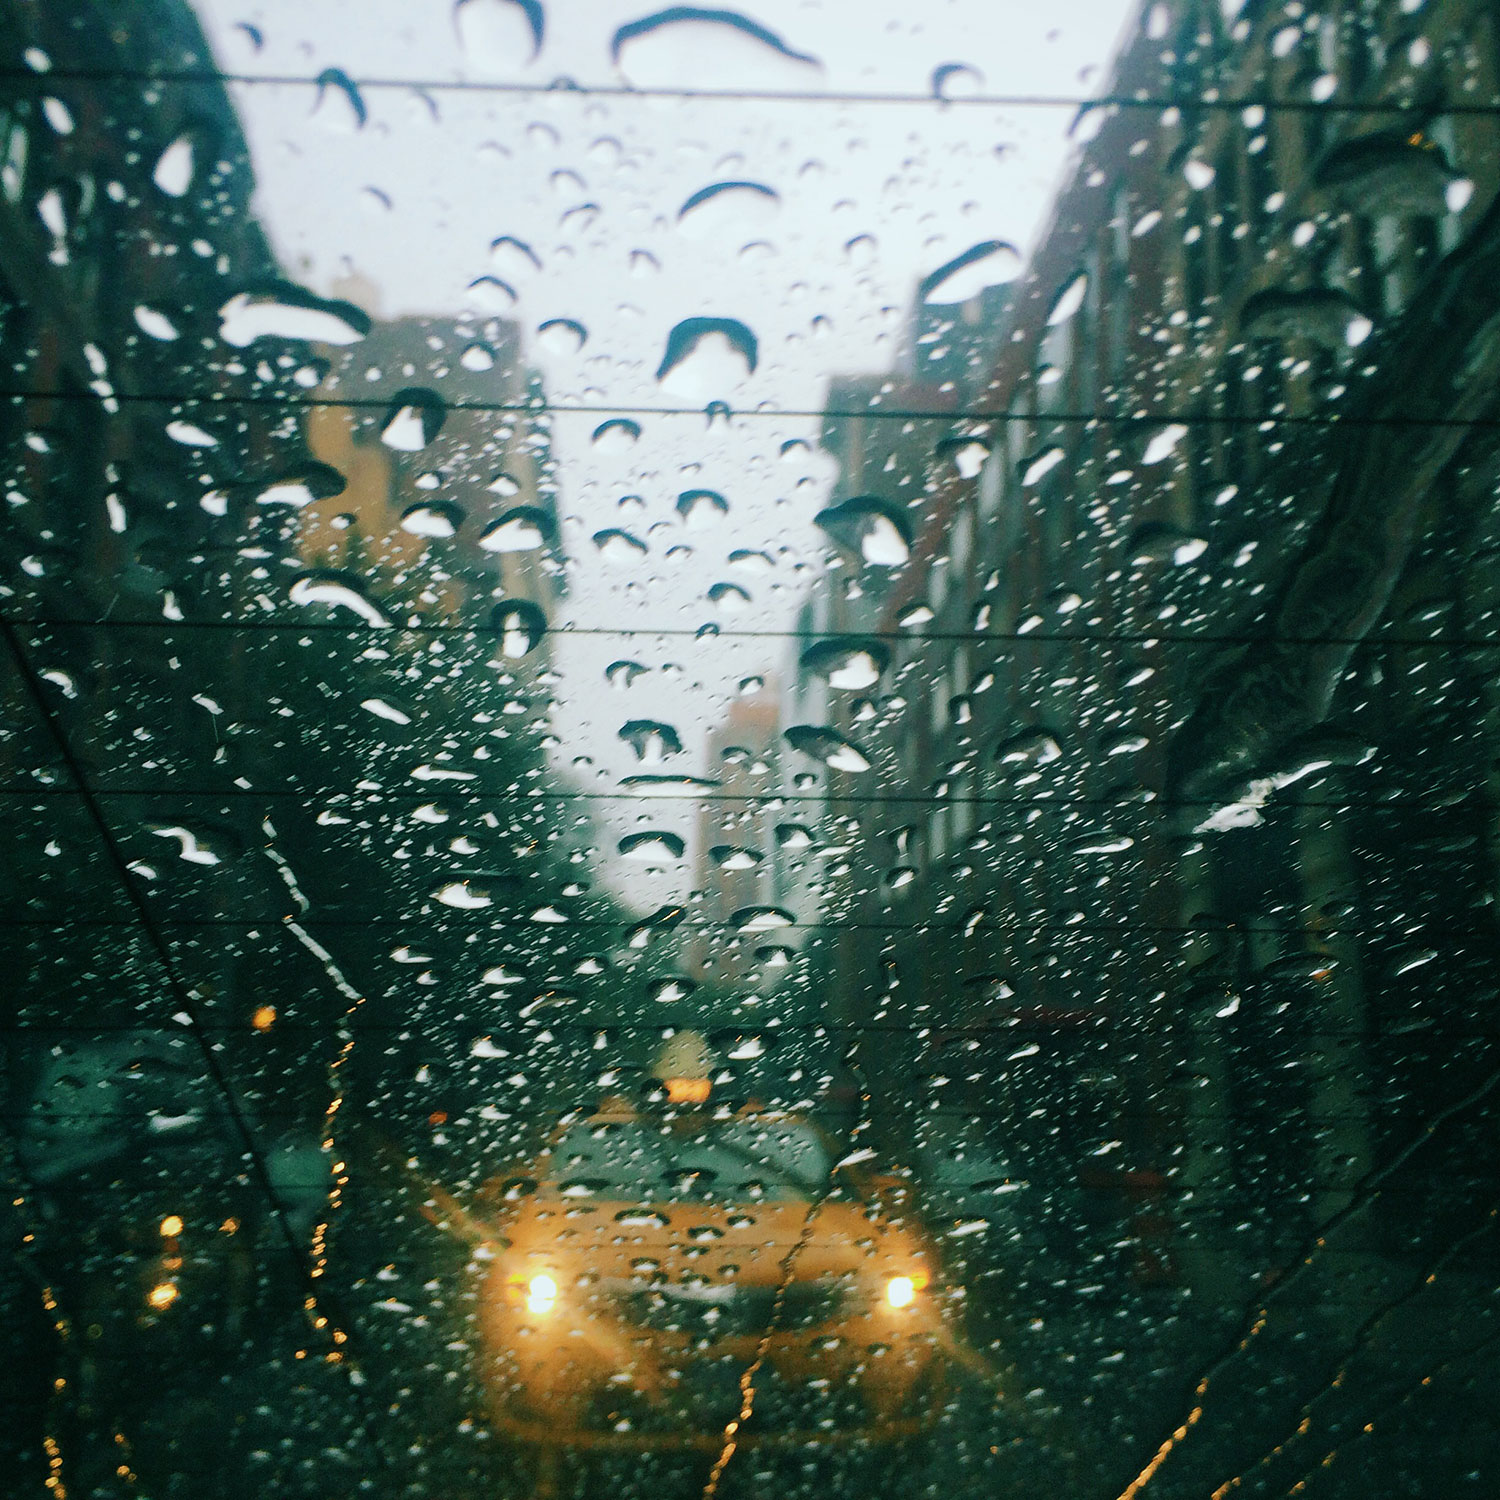
For the image below taken in the backseat of a cab, Fred uses the AF lock to lock focus on the raindrops on the windshield, gets his composition just so, and then slides his finger up or down to adjust exposure accordingly.

Look for People or Objects to Create a Sense of Scale
It’s always a good idea to try and include a person or object in your composition to give a sense of scale. The patrons and waitstaff outside of P.J. Clarke’s do just that.
Use an App to Develop Images
We use Visual Supply Co’s VSCO Cam app to develop our iPhone images. It’s a beautifully simple camera app that allows us to achieve the look and feel of film. You can adjust white balance, exposure, save highlights, add fill, and add film grain among a handful of other features. It’s not over the top or heavy handed, it’s just right.